DIY Guide: How to Upgrade Your Honeywell HZ311 to an Ecobee Smart Thermostat
Your Honeywell HZ311 TrueZONE system has likely been a reliable workhorse, dutifully managing the different temperature zones in your home. It’s a solid piece of equipment. But in an age of smart homes and soaring energy costs, “reliable” is no longer enough. You want smart, efficient, and convenient. You want to adjust your home’s temperature from your phone, save money automatically, and integrate your HVAC system with the rest of your connected life. It’s time for an upgrade.
This is where Ecobee comes in. Transitioning from a basic zone thermostat to a feature-rich Ecobee smart thermostat might seem daunting, especially with a zone control panel in the mix. But here’s the good news: it’s absolutely a DIY project you can tackle. This comprehensive guide will walk you through every step of the process, from choosing the right Ecobee to connecting the last wire.
The single biggest hesitation homeowners have with this upgrade is the wiring. They see the zone panel and think it’s too complex. But the reality is, the HZ311 panel makes this job *easier*. It provides a clear, central hub for all your wiring. With a little patience and a clear guide, you can unlock a whole new level of control and savings for your home.
Why Bother Upgrading from a Functional HZ311 System?
If it ain’t broke, don’t fix it? Not quite. While your old thermostats work, they’re leaving a significant amount of money and convenience on the table. An Ecobee isn’t just a thermostat; it’s a home energy command center.
- Substantial Energy Savings: This is the big one. Ecobee thermostats are ENERGY STAR® certified and can save you up to 26% on your annual heating and cooling costs. They use smart algorithms, local weather data, and room sensors to heat and cool your home far more efficiently than a basic programmable thermostat. If you’re looking for the best smart thermostat for energy savings, Ecobee is consistently at the top of the list.
- Remote Control from Anywhere: Left for vacation and forgot to adjust the temperature? Want to pre-cool the house before you get home from work? With the Ecobee app, you have full control over every zone in your house from anywhere in the world.
- Smart Home Integration: Ecobee plays nice with all the major smart home ecosystems. Control your temperature with your voice using Amazon Alexa, Google Assistant, or Apple HomeKit. Create routines like “Good Morning” that adjust the temperature, turn on the lights, and start your coffee maker.
- Advanced Diagnostics and Alerts: Ecobee monitors your HVAC system’s performance. It can send you alerts if it detects a problem, like a furnace failing to ignite, potentially saving you from a costly emergency repair. It can help you figure out complex issues, like why your thermostat is clicking but not turning on, by providing real-time data.
- Intelligent Comfort with SmartSensors: Ecobee’s signature feature is its room sensors. These small wireless pods measure temperature and occupancy in different rooms, allowing the thermostat to make smarter decisions and eliminate hot or cold spots.
First, Understand Your HZ311 Zone Control Board
Before you touch a single wire, it’s crucial to understand what your Honeywell HZ311 TrueZONE panel does. This panel, usually located near your furnace or air handler, is the brain of your zoned HVAC system. It receives signals from each of your thermostats (one for each “zone”) and then opens or closes dampers in your ductwork to direct conditioned air only to the zones that need it.
For this upgrade, you aren’t replacing the HZ311 panel itself—you are only replacing the individual thermostats in each zone that are connected *to* the panel. This is a key distinction. The Ecobee will become the new, smarter input device for your existing, perfectly functional zone control system.
Pro Tip: One Zone at a Time
If you have multiple zones (e.g., upstairs and downstairs), we highly recommend upgrading them one at a time. Complete the entire installation for Zone 1, get it working perfectly, and then move on to Zone 2. This prevents confusion and makes troubleshooting much easier.
Step 1: Gather Your Tools and Your New Ecobee
Having everything ready before you start will make the process smooth and frustration-free. Here’s what you’ll need.
Essential Tools & Recommended Gear

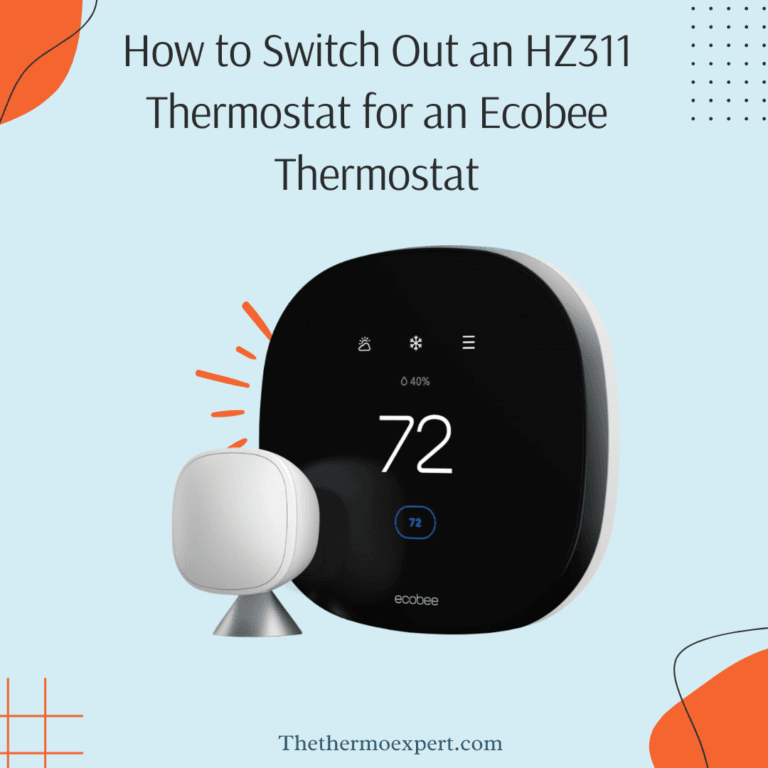
Ecobee Smart Thermostat Premium
The top-of-the-line model. Includes a SmartSensor, built-in Alexa, and an air quality monitor. Its premium build and full feature set make it the ultimate upgrade.
Check Price on Amazon
Universal Thermostat Wall Plate
Your old thermostat likely has a larger footprint. This wall plate will cover any unpainted areas or old screw holes for a clean, professional-looking installation.
Check Price on Amazon
Precision Screwdriver Set
Thermostat screws are tiny. A good set with both Phillips and flathead bits is essential. A magnetic tip is a huge plus for preventing lost screws.
Check Price on AmazonYou’ll also need:
- Smartphone or Tablet: For taking a picture of the wiring and for the Ecobee app setup.
- Needle-nose Pliers: For handling and straightening wires.
- Wire Stripper: Unlikely you’ll need it, but good to have just in case.
- Small Level: To ensure your new thermostat isn’t crooked.
- Pencil: For marking screw holes.
As an Amazon Associate, we earn from qualifying purchases. The product recommendations above are based on our expert opinion and real-world installation experience.
Step 2: The Step-by-Step Installation Process
Alright, let’s get to the main event. Follow these steps carefully, and you’ll have your Ecobee up and running in no time. We’ll start with Zone 1.
1. SAFETY FIRST: Turn Off Power to Your HVAC System!
This is the most important step. Go to your home’s main circuit breaker panel. Find the breaker that controls your furnace or air handler (it’s often labeled “HVAC,” “Furnace,” “Air Cond,” or something similar). Flip it to the **OFF** position. To confirm the power is off, try to change the temperature on your old thermostat. The screen should be blank or unresponsive. Do not skip this step!
Warning: Risk of Damage
Working with thermostat wires while the power is on can short-circuit your HVAC system’s control board, leading to a very expensive repair. Double-check that the power is off before proceeding.
2. Remove Your Old Thermostat Faceplate
Most old thermostat faceplates simply pull straight off the wall mount. Some may have a small button or tab on the bottom you need to press. Once it’s off, you’ll see the wall plate with the wiring terminals.
3. The CRITICAL Step: Photograph and Label Your Wires
Before you disconnect a single wire, pull out your smartphone and take a clear, well-lit picture of the existing wiring. Make sure you can clearly see which color wire goes into which lettered terminal (e.g., Red wire in ‘R’, White wire in ‘W’). This photo is your ultimate backup plan.
Your Ecobee comes with a set of small wire label stickers. Use them! For each wire connected to your old thermostat, place the corresponding sticker on it. If a wire is in the ‘Y’ terminal, put the ‘Y’ sticker on that wire. This simple act prevents 99% of installation headaches.
4. Disconnect Wires and Remove the Old Wall Plate
With the wires labeled, carefully unscrew the terminals and disconnect each wire. Gently straighten them out if needed. Then, unscrew the old wall plate from the wall and remove it completely. You may want to use this opportunity to clean the wall or install the new, larger wall plate to cover old paint marks.
5. Mount the New Ecobee Backplate
Gently feed the bundle of wires through the center opening of the Ecobee backplate. Place the backplate on the wall, use your small level to make sure it’s straight, and use a pencil to mark where the new screws will go. If you can’t hit a stud, use the included drywall anchors for a secure fit. Screw the backplate firmly to the wall.
6. Connect the Wires to the Ecobee
This is the moment of truth. The Ecobee backplate has easy-to-use push-in connectors. Simply match the label on your wire to the corresponding terminal on the backplate and push the copper end in until it clicks securely.
A Note on the C-Wire (Common Wire)
Ecobee thermostats require a C-wire to get continuous power. Unlike some battery operated thermostats, smart thermostats need this constant 24V supply. The good news? Because you have an HZ311 zone panel, you are almost guaranteed to have a C-wire already running to your thermostat. It provides the power for the zone panel’s electronics. If you see a wire connected to the ‘C’ terminal on your old thermostat, you’re all set! If for some reason you don’t, your Ecobee comes with a Power Extender Kit (PEK) that is installed at the zone panel, but this is very unlikely for your setup.
Once all wires are connected, gently push any excess wiring back into the wall for a clean fit. Attach the Ecobee faceplate—it should click on satisfyingly.
7. Power Up and Complete the Setup
Head back to your circuit breaker and flip the HVAC power back **ON**. Your new Ecobee should power on and greet you. The on-screen guide will walk you through the initial setup, including:
- Connecting to your Wi-Fi network.
- Configuring your HVAC equipment (it should auto-detect this).
- Setting your temperature preferences.
You’ll also be prompted to download the Ecobee app and register your device. This is how you’ll enable remote control and all the other smart features. Be sure to follow all the thermostat instructions for homeowners provided by Ecobee for the best results.
Frequently Asked Questions (FAQ)
Do I need to replace the HZ311 Zone Control Panel itself?
No, absolutely not. The Ecobee thermostat is designed to work with standard HVAC systems and zone control panels like the HZ311. You are only replacing the “dumb” thermostats on the wall, not the “brain” by your furnace.
What if I don’t have a C-wire at the thermostat?
While highly unlikely with an HZ311 system, if you don’t have a C-wire, you must use the included Power Extender Kit (PEK). This small adapter is installed at the zone control board (not the thermostat) and uses your existing wires to create a “virtual” C-wire. The Ecobee app provides excellent, step-by-step instructions for installing the PEK.
My Ecobee isn’t turning on after installation. What should I do?
First, double-check that you turned the circuit breaker back on. Second, gently pull the Ecobee faceplate off and ensure all wires have a solid connection in their terminals. Third, make sure your R (Power) and C (Common) wires are in the correct terminals. If problems persist, it might be an issue with your HVAC system itself. Sometimes, an issue like a Sensi thermostat not working can have similar root causes related to the HVAC system’s power.
Can I use just one Ecobee for multiple zones?
No. A zoned system requires one thermostat for each zone. To get the full benefit of zoning, you will need to replace the thermostat in each zone you wish to control with a smart thermostat. You can mix and match (e.g., an Ecobee downstairs and keep the old one upstairs), but for a true smart home experience, upgrading all zones is recommended.
Conclusion: Welcome to a Smarter, More Efficient Home
Congratulations! By replacing your old thermostats with Ecobee smart thermostats, you’ve taken a massive step toward a more comfortable, convenient, and energy-efficient home. You’ve bridged the gap between a robust, traditional HVAC zone system and modern smart home technology.
Now, take some time to explore the Ecobee app, set up schedules, and look at the detailed energy reports. You’ll quickly see how your smart investment is paying off, giving you precise control over your comfort and your energy bills. Enjoy the upgrade—you’ve earned it!


